| Lesson 4 | Adding space |
| Objective | Allocate more space to a tablespace. |
Add space to Oracle tablespace
In due course, you will need to add more space to a tablespace to accommodate the growth of objects within that tablespace. One way to add space to a tablespace is to add a data file. Another is to increase the size of an existing file. Adding data files allows you to spread I/O around to other disks. Increasing the size of an existing file may not work if there is no more room on the disk containing the file. Use the approach that you feel will be best in your situation.
Adding file to tablespace
You can add a file to a tablespace using theALTER TABLESPACE command. Here's an example:
ALTER TABLESPACE COIN
ADD DATAFILE 'E:\ORADATA\COIN\COIN02.DAT'

SIZE 500M;
This example adds a 500 megabyte file to the tablespace. You can add as many data files to a tablespace as you like, and you can spread I/O around by placing the files on different disks.
Increasing size of Data file
Another way to add space to a tablespace is to increase the size of one of the existing data files. As long as there is enough space on the disk, you can do this on most platforms. First determine the name of the file that you want to resize; do this by querying the dba_data_files view. Then resize the file using an
ALTER DATABASE command, like this:
ALTER DATABASE

DATAFILE 'E:\ORADATA\COIN\COIN01.DAT' RESIZE 1000M;
The
RESIZE clause specifies the new size. Oracle will attempt to shrink or grow the file to match the new size.Storage Manager
Storage Manager can be used to create and manage tablespaces. The following simulation walks you through the process of using it to add a data file to the
COIN tablespace:
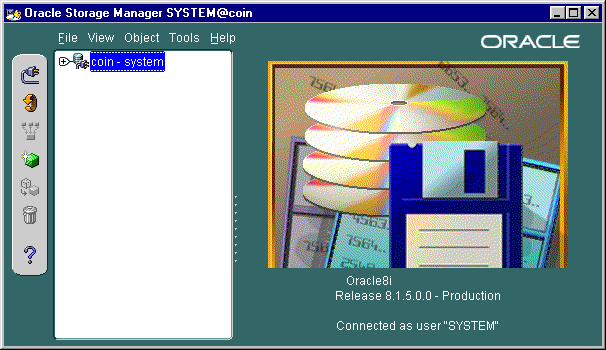
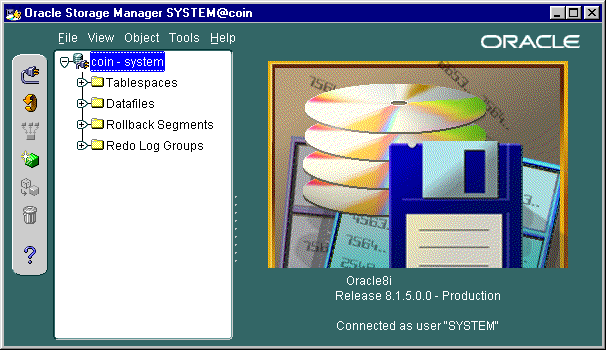

- This is the opening screen that you will see after starting Storage Manager. Click on the plus sign (+) by the COIN database icon to expand the list of items that you can manage using Storage Manager.
- ClickCoinPlusSign,
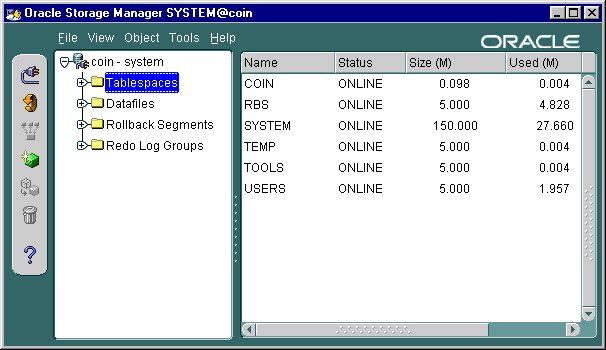
- Click on the Tablespaces icon to see a list of tablespaces in the right pane.
- ClickTablespaces,
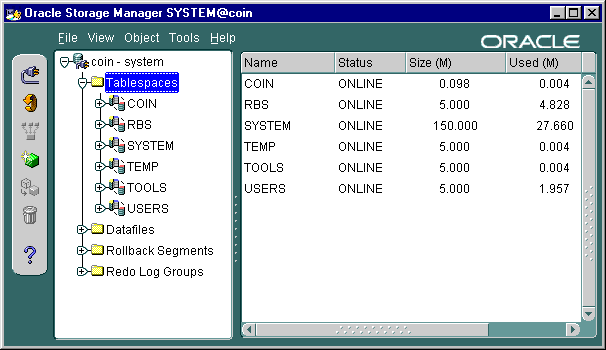
- Notice that the tablespace listing includes the status (online or offline), the size of the tablespace, and the amount of space actually used. Now click the plus sign (+) by the Tablespaces folder to expand the list of tablespaces in the left pane.
- Click Tablespaces PlusSign
- One of the tablespaces listed is named COIN. Click on COIN, and you will see information about that tablespace appear in the right pane.
- ClickCoin
- error
- Try clicking COIN under Tablespaces on the left hand menu.
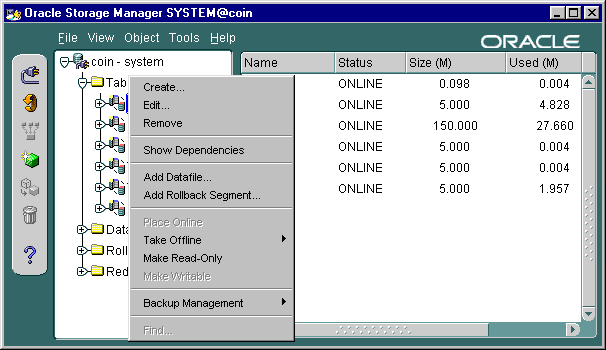
- Select Add Datafile from the pop-up menu.
- Select AddDatafile
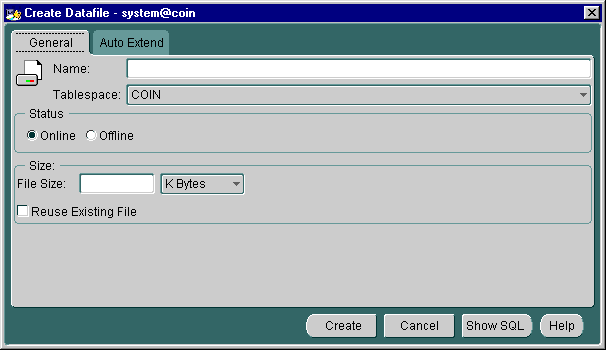
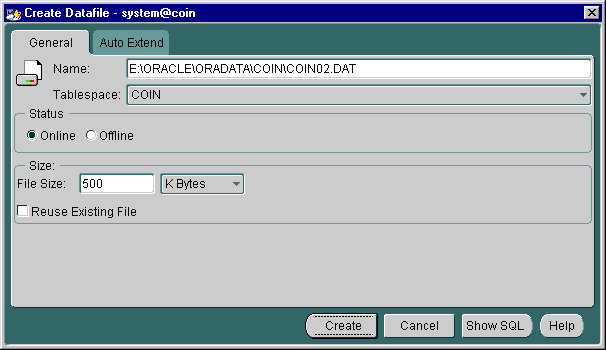
- You will be presented with this Create Datafile dialog. Type E:\ORACLE\ORADATA\COIN\COIN02.DAT in the Name field, and then click Create to add the new data file.
- ClickCreate
- Name field
- E:\ORACLE\ORADATA\COIN\COIN02.DAT
- Enter E:\ORACLE\ORADATA\COIN\COIN02.DAT in the Name box.
- Storage Manager will display this dialog telling you that the new file was successfully created and added to the tablespace. This is the end of the simulation. Click the Exit button.
Adding data files with Storage Manager
- This is the opening screen that you will see after starting Storage Manager. Click on the plus sign (+) by the COIN database icon to expand the list of items that you can manage using Storage Manager.
- Click on the Tablespaces icon to see a list of tablespaces in the right pane.
- Notice that the tablespace listing includes the status (online or offline), the size of the tablespace, and the amount of space actually used. Now click the plus sign (+) by the Tablespaces folder to expand the list of tablespaces in the left pane.
- One of the tablespaces listed is named COIN. Click on COIN, and you will see information about that tablespace appear in the right pane.
- Select Add Datafile from the pop-up menu.
- You will be presented with this Create Datafile dialog. Type
E:\ORACLE\ORADATA\COIN\COIN02.DAT
in the Name field, and then click Create to add the new data file. - Storage Manager will display this dialog telling you that the new file was successfully created and added to the tablespace.
Adding Data Files - Exercise
Click the Exercise link below to practice adding data files to a database.
Adding Data Files - Exercise
Adding Data Files - Exercise