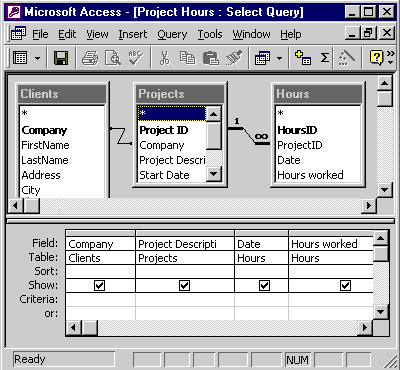
Editing Query Design - Exercise Result
You entered:
When the exercise is complete the Design view for the query should look something like this. Your tables may be in a different order and you may not have altered the width of the columns in the grid as I did. These instructions correspond to the steps in the exercise:
- To add a table, click the Show Table button, select the Clients table, and click the Add button. Click the Close button to close the dialog box. If you do not like the arrangement of the tables in the Tables pane you may want to move them by clicking and dragging the title bar or a table box.
- Double-click field names to add them to the first free column in the design grid (you may have to scroll the design grid to see that they are there. Alternatively, you can click and drag the field from the tables pane to put it exactly where you want it in the design grid, other columns will move to the right to make space for the new field.
- To move a field, first select it by clicking the gray column selector at the top of the column. Then click and drag the column to its new location.
- To view the results, click the View button (the first button on the toolbar).
- Click the View button in datasheet view to display Design view.
- To delete a field from the design grid, first select the column by clicking the gray column selector at the top of the column. Then press the Delete key on your keyboard to delete it.
- Close the query by clicking the query window close button. Access will ask you if you want to save changes. Click Yes.